Product designers
A front-facing product image shows the silhouette, key color blocks, and major features of a new object.
hi3d supplies a quick volumetric draft that helps teams review proportions before detailed modeling.
Image conversion
hi3d turns a carefully chosen 2D image into a starting 3D model, giving you form, depth, and a downloadable asset without blocking your creative workflow.
Choose the right starting point
The best result depends on what the source image clearly shows. Use the flat reference as evidence, not as a complete blueprint.
A front-facing product image shows the silhouette, key color blocks, and major features of a new object.
hi3d supplies a quick volumetric draft that helps teams review proportions before detailed modeling.
A concept sheet or character render provides a recognizable pose, costume, and visual identity.
The generated mesh becomes a blockout for sculpting, retopology, materials, or additional reference work.
A clean photo of a simple figurine or object gives the conversion process a distinct outline and visible surfaces.
hi3d creates an editable starting point that can be inspected and prepared for a later print workflow.
A single diagram, artifact photo, or classroom reference needs to become easier to view from different angles.
A generated 3D model makes spatial discussion more concrete while keeping expectations realistic about hidden detail.
Set expectations
A 2D reference contains only visible evidence. hi3d can infer plausible structure, but it cannot recover every measurement or hidden surface from one view.
| 2D reference | Generated 3D model | |
|---|---|---|
| Primary information | Color, outline, visible texture, and one camera angle | Volume, surface orientation, and a navigable object |
| Depth | Suggested by shading, perspective, and overlap | Estimated from visual cues rather than measured directly |
| Back side | Usually absent from the source | Invented or completed as a plausible continuation |
| Exact dimensions | Unavailable without scale or multiple references | Approximate unless corrected against known measurements |
| Small details | May be visible as pixels or painted marks | May be softened, simplified, or interpreted as geometry |
| Material behavior | Captured as a flat appearance under one light | Represented as a surface estimate that may need shader adjustments |
| Topology | Not applicable to a flat image | Created for a usable draft, but may need cleanup for animation or production |
| Confidence level | High for clearly visible contours | Highest on the front-facing, well-lit parts of the object |
See the transformation
Compare the source view with the generated result before you decide whether the asset is ready for editing, sharing, or print preparation.
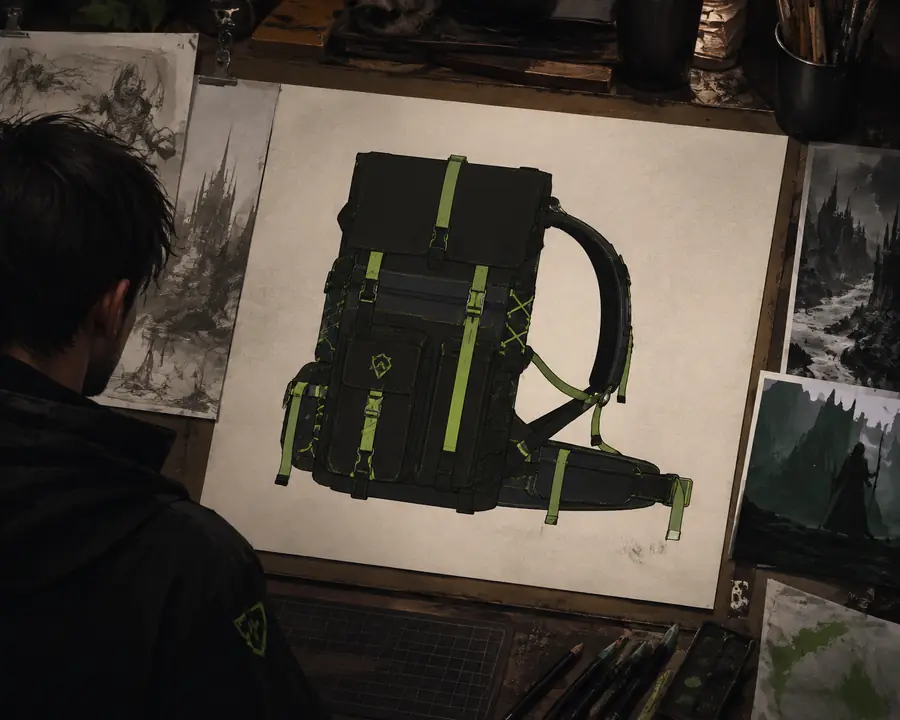
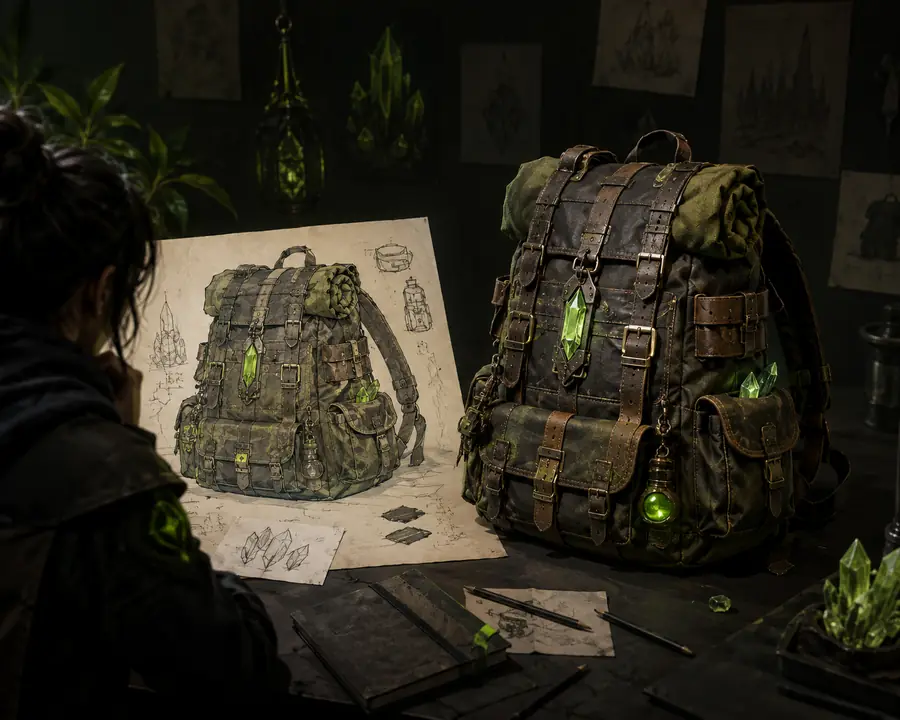
The divider is a review aid, not a promise of identical geometry. hi3d preserves the strongest visible cues first, while hidden areas and fine construction details remain candidates for manual correction.
2D reference3D resultA practical workflow
Treat the first output as a reviewable draft. This short sequence helps you separate a convincing visual match from a technically ready asset.
Rotate the result and compare its outline with the reference. Check the major proportions, stance, openings, and distinctive edges before worrying about small details.
Look behind the object, underneath overhangs, and inside visible gaps. These areas are most likely to contain plausible guesses rather than faithful reconstruction.
Use a known dimension or a simple measuring reference when accuracy matters. Correct uneven sides, exaggerated depth, and perspective-driven distortions before export.
For a render, inspect lighting and materials. For a game asset, check topology and deformation needs. For printing, confirm watertight geometry, wall thickness, and support requirements.
Keep the hi3d draft if it solves the broad shape. Spend manual effort on the few visible features that affect recognition, fit, animation, or successful fabrication.
Know the boundaries
These are the questions that matter when turning one flat source into a 3D starting point.
Choose a clear image with one dominant subject, strong contrast, and minimal obstruction. Send it through hi3d, then inspect the generated form from several angles.
What to do instead
Use additional references or manual modeling when the object has important hidden geometry.
Usually not. A single view cannot prove the depth, back side, internal structure, or real-world dimensions of an object.
What to do instead
Provide multiple views when available and verify measurements before treating the result as precise.
It may be a useful starting asset, but readiness depends on topology, scale, watertightness, wall thickness, and the requirements of the destination workflow.
What to do instead
Clean the mesh in your preferred 3D application and run the appropriate animation or print checks.
Well-lit, high-resolution images with a clean background and an unobstructed subject give hi3d stronger evidence for shape and surface interpretation.
What to do instead
Crop away distractions, avoid extreme perspective, and use a second angle for complex objects.